


As intimidating as they may be, learning how to use Geometry Nodes will unlock a whole new world in Blender. Here’s a quick beginner level set-up that can get you started.
If you follow much Blender related news at all, you’ve probably noticed the amazing things that people are able to do with geometry nodes. Geometry nodes bring many aspects of the procedural node based workflows from programs like houdini directly into blender.
It allows you to create incredible things in ways that allow you to manipulate and reorganize the geometry in crazy ways, all by sliding a slider or drawing a line. Geometry nodes aren’t as complicated as they look, but you’ll just have to learn an entirely new system that involves a ton of different nodes and techniques.
Geometry nodes might be a little scary at first, but the only way to learn is to start using them. This tutorial by the very talented Nathan Duck of Ducky3D will get you started on the right foot.
All it takes is learning some of the more commonly used nodes, and sort of over time understanding what you use them for and why they do what they do. You don’t have to be a math-wiz or an engineer of some sort to understand nodes like these, you just need to understand the systems that they create and what those systems can achieve.
Creating The Grid
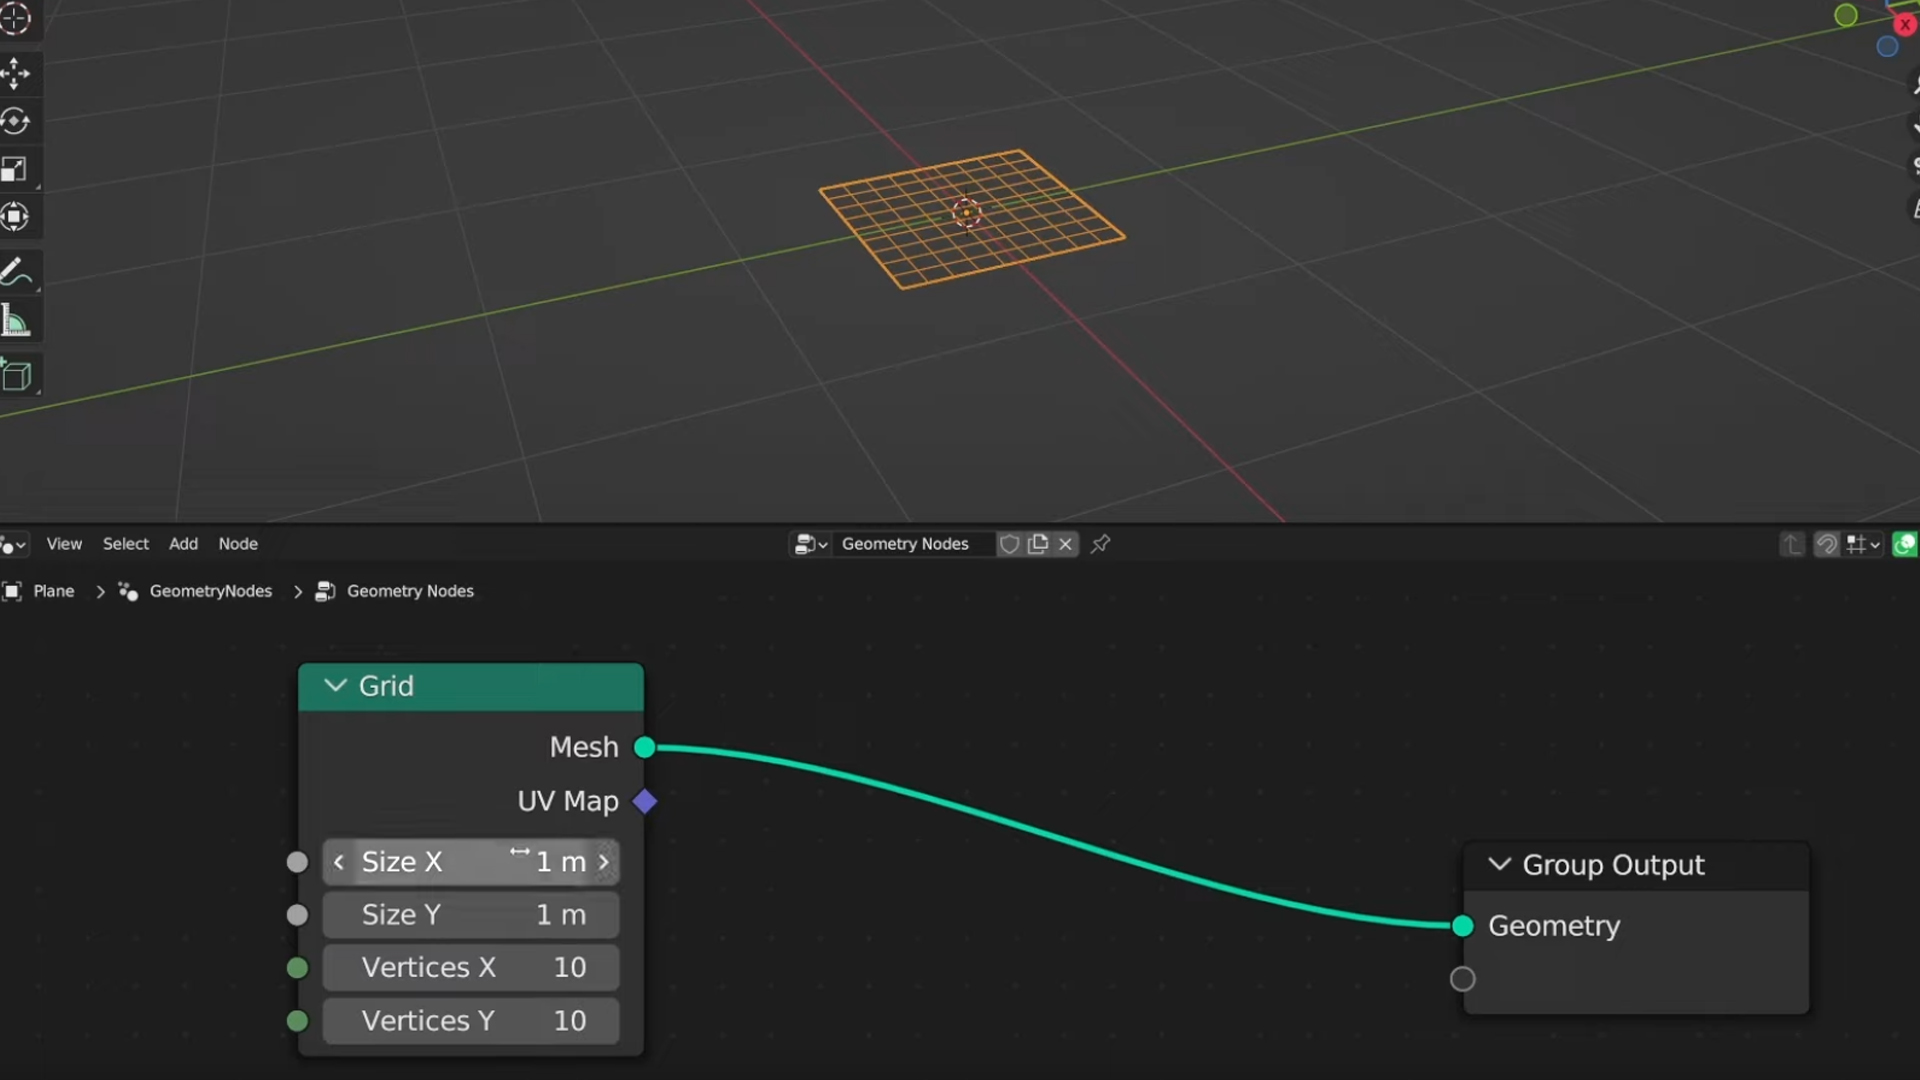
To make a grid, there is simply a node that you can add right there in the geometry nodes. Just create a plane, and head into the geometry nodes tab and hit Shift + A to create a grid node.
There you can decide how many rows and columns you want to add. It’s important to note at this stage that you haven’t really created anything with much of an effect yet, you’re going to use this grid to distribute and influence where your geometry is placed later on.
Adding Variation
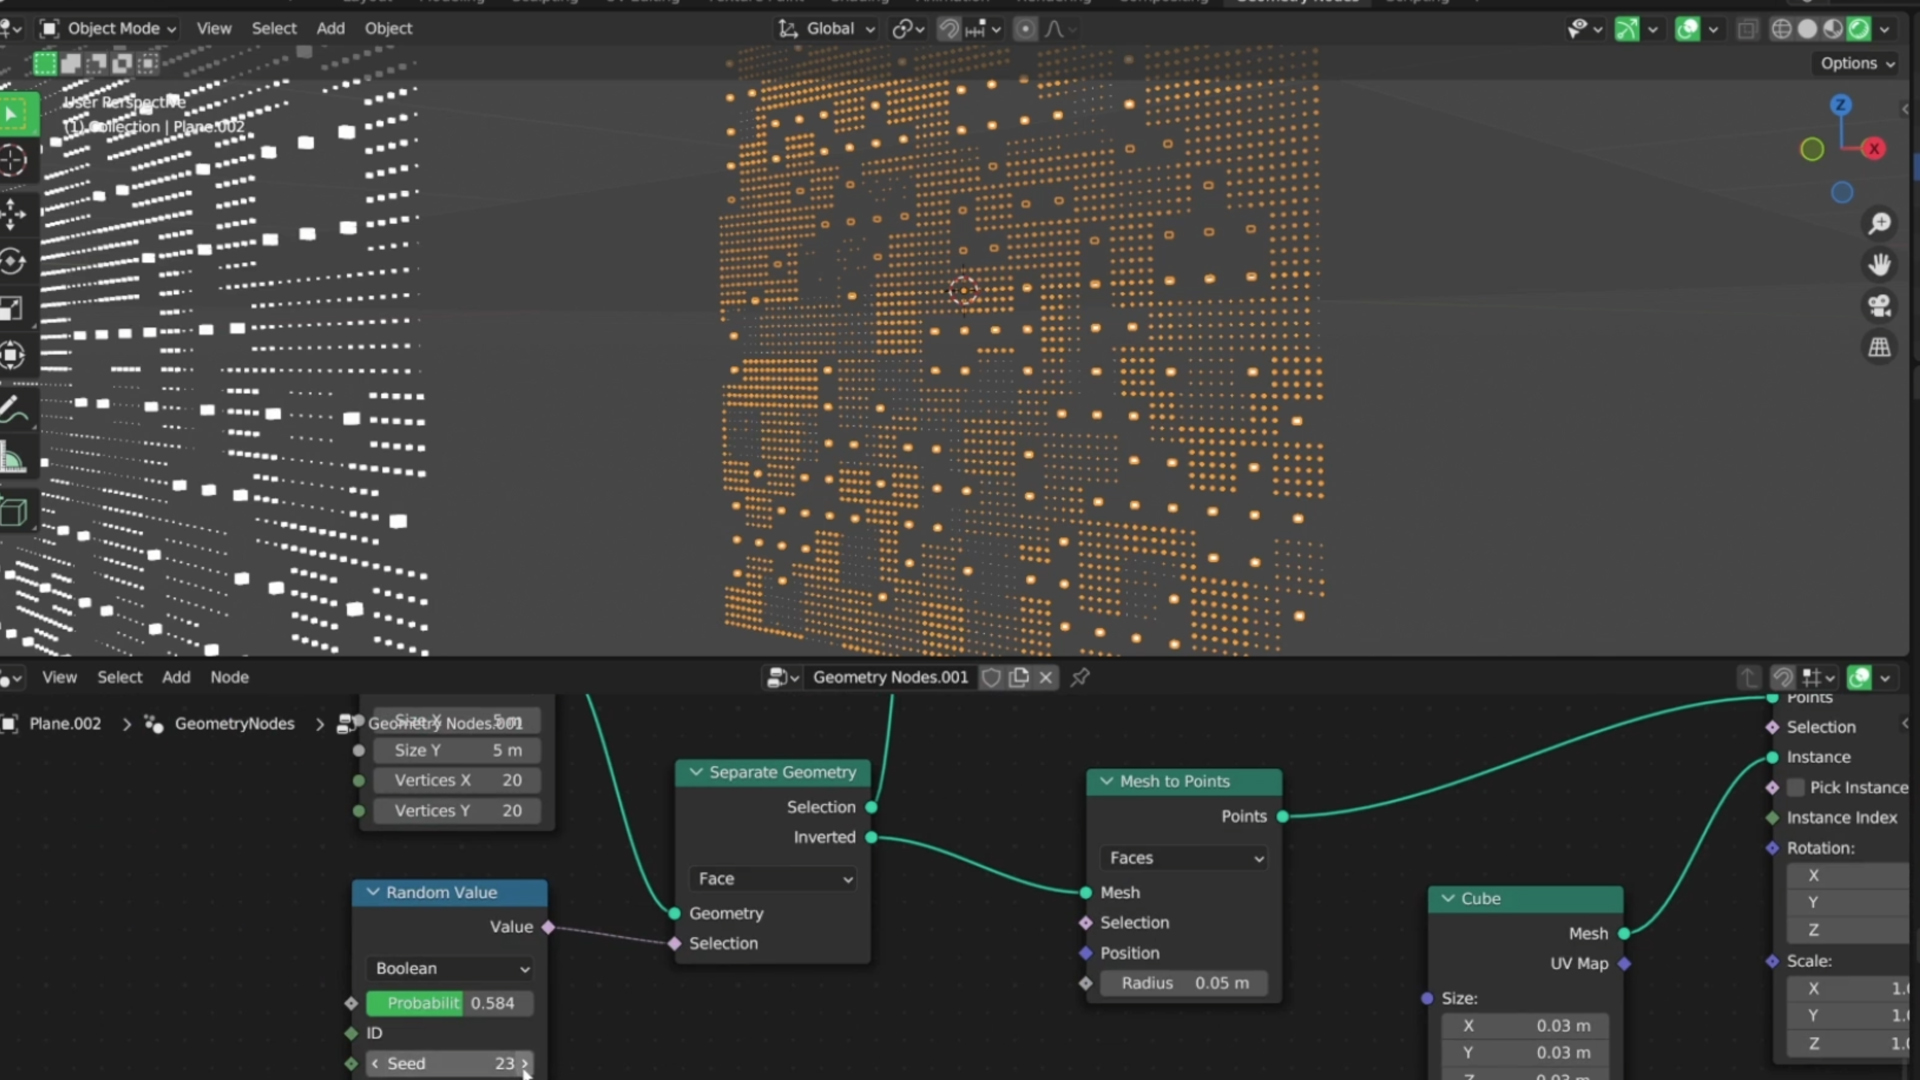
Now you can start to distribute meshes across the points that you create. You can use a node called “Instance On Points” to distribute a cube mesh across the various points on your grid.
This will create a really straight forward grid of cubes, which if that’s the effect you’re going for, then you’re good to go. But you might want to add quite a bit more variation to what you’re making. For instance, if you want to have some cubes appear bigger than others to achieve a bit more of an intricate effect, you can do that really easily with nodes as well.
In the tutorial, Nathan uses a Brick Texture plugged into a Color Ramp node to create another perfect grid on top of his grid, but this one will be used to influence the scale of the cubes. With the Brick texture plugged into the color ramp, using the sliders on the ramp will spread the scale of the cubes up or down based on the black or white value assigned to them. This creates a really complex and procedural scale value effect across the entirety of the grid.
Creating The Looping Animation
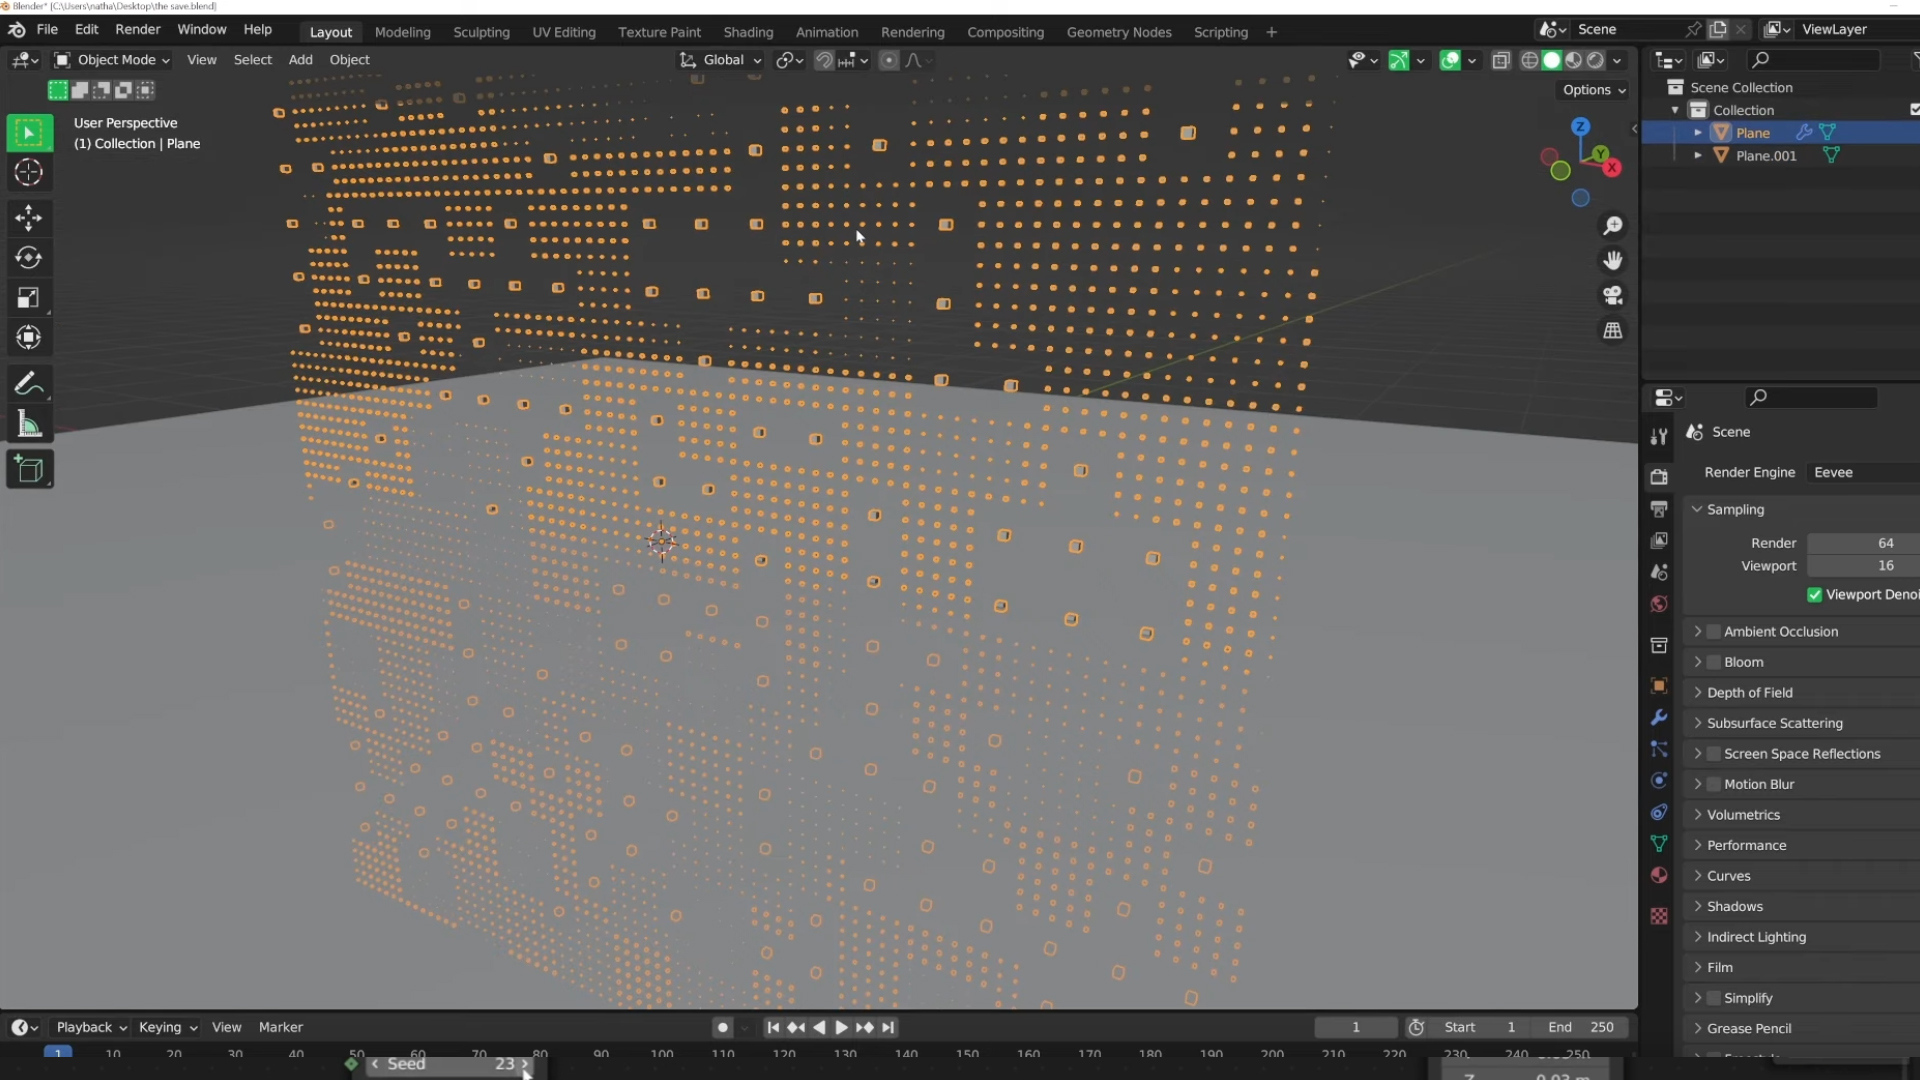
In the video, Nathan states that he uses something he calls “The Box Method” to create his loops. This approach basically consists of creating a plan or cube to use as a guide, and making sure that everything you create is snapping within that cube and aligned to the grid. To make sure things are staying on the correct points on the grid, you just make sure that you hold down the CTRL key as you move things. This will snap to grid as you move.
Then, as you duplicate your objects, you’ll use instancing rather than duplication. What this does, is it makes a new instance of the geometry rather than creating entirely new copies of that geometry. Instancing is a VERY useful tool to have when you’re working with complex scenes. The difference between duplicating and instancing is you use Alt+D as the shortcut rather than Shift+D. Shift+D will make an entirely new version of the geometry you duplicate, which will hog more VRAM. Instancing will make it so that whatever changes you make to one copy will happen to all copies.
So you want to make sure that you make each copy have it’s own unique node seed value. To do this you’ll click the little number right next to the node tree’s name in the geometry node tab. It’s pretty easy, but this way, everything will look unique, but will snap along the grid and loop perfectly.

Dive into real-time 3D with our Unreal Engine beginner's course by Jonathan Winbush. Master importing assets, world-building, animation, and cinematic sequences to create stunning 3D renders in no time! Perfect for motion designers ready to level up.
Explore this Course ➔
Unlock the secrets of character design in this dynamic course! Explore shape language, anatomy rules, and motifs to craft animation-ready characters. Gain drawing tips, hacks, and Procreate mastery (or any drawing app). Ideal for artists seeking to elevate their craft.
Explore this Course ➔
Elevate your freelance motion design career with our guide to client success. Master a repeatable method for finding, contacting, and landing clients. Learn to identify prospects, nurture leads, and develop a thriving freelance philosophy amidst chaos.
Explore this Course ➔
Rev up your editing skills with After Effects! Learn to use it for everyday needs and craft dynamic templates (Mogrts) for smarter teamwork. You'll master creating animated graphics, removing unwanted elements, tracking graphics, and making customizable templates.
Explore this Course ➔
Stand out with Demo Reel Dash! Learn to spotlight your best work and market your unique brand of magic. By the end, you'll have a brand new demo reel and a custom campaign to showcase yourself to an audience aligned with your career goals.
Explore this Course ➔
Illuminate your 3D skills with Lights, Camera, Render! Dive deep into advanced Cinema 4D techniques with David Ariew. Master core cinematography skills, gain valuable assets, and learn tools and best practices to create stunning work that wows clients.
Explore this Course ➔
Master After Effects at your own pace with Jake Bartlett's beginner course. Perfect for video editors, you'll learn to create stylish animated graphics, remove unwanted elements, and track graphics into shots. By the end, you'll be equipped for everyday AE needs and more.
Explore this Course ➔Revolutionize your Premiere workflow with customizable AE templates! Master creating dynamic Motion Graphics Templates (Mogrts) in After Effects to speed up your team's work. By the end, you'll craft easily-customizable templates for seamless use in Premiere Pro.
Explore this Course ➔

Interested in learning 3D?
We've got courses on Cinema 4D, Unreal Engine, and a whole series dedicated to 3D animation called Lights, Camera, Render!
Check out our 3D courses here.
More on Blender and 3D
Not sure where to start?
If you’re a beginner, here are some great courses to help you get started:

After Effects Kickstart
Dive into the fundamentals of motion design with our most popular (and recently updated) After Effects course.

Photoshop + Illustrator Unleashed
Master the basics of Photoshop and Illustrator and gain invaluable insights in this introductory level course.

Design Kickstart
An introduction to the design principles behind all great work.
More Advanced?
If you’re a more advanced student looking to up your game, here are some great options:

Animation Bootcamp
Learn the art and principles of creating beautiful movements in Adobe After Effects.

Design Bootcamp
Learn to design for motion in this intermediate-level, project-based course.
Cinema 4D Basecamp
Learn Cinema 4D from the ground up in this exciting introductory C4D course.
Now is the time to learn the skills you need to advance in your motion design career:


