Improve your Mocha tracking and clean up by using this clever After Effects workflow.
Motion Tracking is one of the most common tasks an After Effects artist will tackle. But, it's easy to start off on the wrong foot, leaving you to fight with the software. Would you like to know how the pros get clean and flexible tracks for replacing objects in a scene? Of course you do.

Industry legend and VFX for Motion instructor Mark Christiansen lays out his tracking workflow which uses Mocha planar tracking, Photoshop, and some After Effects magic.
This is just a taste of the professional workflows taught in our VFX for Motion course. If you find yourself better off after this tutorial, just remember there's a lot more where that came from, so make sure to check out our courses page! Onwards!
Mocha Tracking and Clean Up Tutorial
{{lead-magnet}}
What are you going to learn in this tutorial?
This tutorial is fairly short, but jam-packed. Mark covers the full workflow he uses to create a clean-plate and to composite a graphic onto a tracked piece of footage. You will learn:
HOW TO DO BASIC PLANAR TRACKING IN MOCHA AE
You might be familiar with point-tracking in After Effects, but planar tracking is far more powerful and usually easier.
WHICH SETTINGS TO USE FOR PROPER MOTION TRACKING
Mocha AE is a very deep tool, and it helps to know which settings to focus on for the best results.
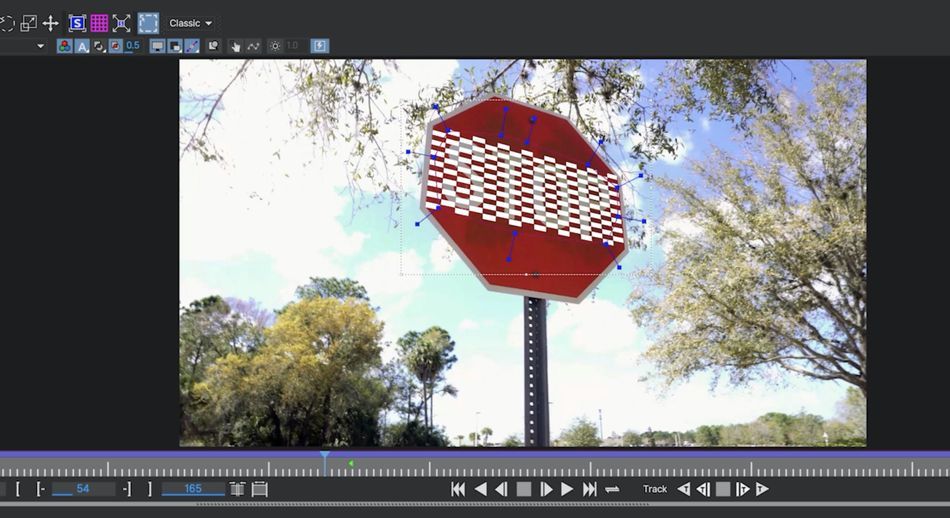
HOW TO APPLY THE SCALE SURFACE TO FRAME FEATURE
This is the secret sauce. You may never go back to doing standard corner-pin tracks.
PHOTOSHOP TIPS FOR REMOVING THINGS FROM A FRAME
You don't need to know every tool in Photoshop, only these two. Clean plates will be a breeze.

REAPPLYING A CLEAN PLATE TO YOUR SHOT
Now you've got a clean plate. What do you do with it? We'll tell you.
TRACKING IN A GRAPHIC TO YOUR FOOTAGE
The entire point of this tutorial is to composite a graphic onto some footage of a sign. We finally get there in step #6.
COMPOSITING TRICKS TO SELL THE REALISM OF YOUR FINAL SHOT
As a compositor, you need to learn a few tricks that will help sell the believability of your work.

Dive Deeper into Visual Effects
This is just a small taste of the wonderful and complex world of visual effects. If you're ready to take a course geared towards VFX, make sure to check out VFX for Motion.
Some of the coolest work in the industry blurs the line between Motion Design and Visual Effects. This class will teach you to move between both worlds, using advanced compositing techniques to add another dimension to your work.
VFX for Motion will teach you the art and science of compositing as it applies to Motion Design. Prepare to add keying, roto, tracking, matchmoving and more to your creative toolkit.
-----------------------------------------------------------------------------------------------------------------------------------
Tutorial Full Transcript Below 👇:
Mark Christiansen (00:00): Well, hello there I'm Mark Christiansen, visual effects, artist and motion designer. In this short video, I'm going to show you a mocha tracking tip that will basically give you a new superpower Motion tracking is one of the most common tasks. And after effects, artists will tackle. I'm going to show you a time-saving trick that will blow your mind. Now, if you really want to hone your compositing chops, check out the effects for motion, the compositing and visual effects class that's built for motion designers. You can also download the project files and using this video to follow along or practice with after you're done, watching details are in the description.
Mark Christiansen (00:44): All right, so here's a fun challenge. We're going to remove the word. Stop from the stop sign. Most likely illegal. We're going to replace it with the school of motion logo. Now on the surface, this may seem like a fairly straightforward tracking exercise, but if you approach it the wrong way, you'll be fighting the software the entire time. The first thing we're going to need to do is track the sign. We're going to do that using mocha III, which comes for free with after effects. So that applied the mocha effect layer. Now I'm going to click this button, but before I do that, I need to be in full resolution. Now mocha has opened and we're ready to track, even though this is sort of the light version of mocha, it is very powerful. And there are a lot of features. If you really want to go deep with this tool, checkout VFX for motion link in the description.
Mark Christiansen (01:34): MOCA is a planar tracker, which means that it can actually look at a very large area of your image and figure out how that area is moving. It can even pick up things like perspective change, which is present at the beginning of the shot right here. So to start, I'm going to come up here and just grab the X spline tool. I'm going to zoom into the image a little bit, and then I'm going to draw a shape around the word stop. All I'm trying to do is pick an area that has some good details that the planar tracker can keep track of it. Now, because this tracking area is moving rotating, scaling, and shifting perspective. We do need to have all of these boxes check down here. Now I can track forward. You can see that MOCA is doing a very good job of tracking this blue area.
Mark Christiansen (02:17): It tells me that this part of the shot's been tracked. And now we need to track backwards from this frame. This error message is just telling me that at this frame, there nothing left to track. As we scrubbed through this, you can see that MOCA did a really good job of tracking. Even at the beginning of the shot. Now, typically what you would do at this point is named the layer. Something like stop sign, then activate the surface for the layer. This blue box has appeared, and what we can do is position it relatively in perspective as best we can. This is the area that we'll get corner pin in after effects. We can even insert a clip here like a 16 by 16 grid to check how well this track worked and you can see it's a good track. Now, all I have to do is save and head back to after effects.
Mark Christiansen (03:04): Here's a comp that's 1920 by 10 80 with our logo scaled up to basically fill the frame. The reason I chose this size is because that's the resolution of the shot that we tracked. So in the corner pin data, that's coming over from mocha. That's going to be based on that image size. If I drag it VAT comp into the comp with my sign footage, I can then even apply the tracking data from mocha. What I need to do is twirl down, tracking data and go, and first create that tracking data in the effect. There's only one layer in there and it's turned on. If I turn off the logo layer, you can see that now the corner pin information has been applied. Now I just need to apply that same corner pin to my logo. If I go back to this mocha effect, now I can set my export option to corner pin supports.
Mark Christiansen (03:49): Motion blur is that I actually get motion blur for free from after effects. Then I make sure I'm exporting to the correct layer and hit apply. Now the logo is stuck to the sign it's tracking really nicely, but you're probably noticing that it's not the right shape. It's been squashed a little bit vertically. This is really one of the challenges of using this workflow with mocha. You can see that the corner pin is based on the surface that I set inside of moko, which was not 16 by nine. However, the compliment my logo in it is 16 by nine. On top of that, I still need to remove the word stop. It's going to be extremely difficult to create a patch for this. When I have to figure out what that patch should look like in a 1920, by 10 80 comp, that's going to get squashed down to this size here. But of course there's a better way, which I'm about to show you.
Mark Christiansen (04:36): The first step is to pick a good frame, to use it as the source for cleaning this up. So in this case, what that means is I don't want any motion blur. I don't want to pick a frame where the stop sign is really, really small in the frame. If we're zooming in or something like that in this case, I don't have that issue. So I can pretty much pick any of these frames. This one here is nice and sharp, and I'm going to put a marker here with the asterisk key. While I'm on this frame, I can go back into mocha. I'm in sync with after effects, right on that frame. What I'm going to do now is first remove this inserted clip. I'm going to select this layer. And then I'm going to click this button over here. When I do, you might notice that the surface has been expanded to fill the frame.
Mark Christiansen (05:19): If I scrub through, you'll see that it is still tracked to the stop sign. Now, why is this useful? You'll find out in a minute. The next thing I want to do is duplicate the Slayer. I can remove the MOCA III effect. Now I want to freeze frame this layer right on this frame. So I'll right. Click time, freeze frame. Then I'm going to pre compose the layer. I'll move all the attributes into this new composition and name this patch. Next I'll come into my stop sign layer and I'll recreate the tracking data using that stop sign layer. I'll set the layer export to patch and apply the export. Now it might not be entirely obvious what's happening yet, but basically the patch layer, which again is just one frame of this video is now being quarter pinned and distorted to perfectly match the motion of the stop sign.
Mark Christiansen (06:08): Let's go into the patch pre comp and confirm that this is indeed just a still frame to give you a better idea of what exactly is going on. I can do a couple of things. First of all, I can put a mask on this layer like this. Then just for demonstration purposes, I'm going to apply a hue and saturation effect to this and invert the hue back in our main comp. You can now see what's going on. Anything that I do in this patch layer will now come through on the footage pretty slick. And because we exported using the quarter pin supports motion blur option, I can click the motion blur button. What that does is give me free motion blur at the beginning of the shot.
Mark Christiansen (06:48): So we've got two tasks here. The first task is to paint out the word, stop creating a blank stop sign. That's going to be a little tricky because of the texture on this. The second task, which will be far easier is to composite the school of motion logo in place on the sign. Now I could use the clone stamp tool to do this all in after effects, but I'm going to do it a different way. The way I prefer to do this is in Photoshop. So I'm going to export a PNG of the single frame I'm using video co-pilots console plug-in, which makes this really, really easy. I can just copy this frame to the clipboard instead of Photoshop. Now I can just make a new 1920 by 10 80 frame and paste my shot right into it. Now I just make a quick selection and Photoshop.
Mark Christiansen (07:33): Then I can go to edit content aware, fill then using this tool, which works really well in Photoshop. I could clean this up. This whole process took only a few minutes and once it was done, I use the clone stamp to add a few more details, and then it was good. Just like that. It's done. I can now save this and reimport it into after effects. So I've imported that file and I can just drop it on top like this. Then I can lower the opacity just a little bit like this, so that I could see where the stop letters are and draw a simple mask around them. Now turn the opacity backup and feather the mask, a few pixels. Now we've got our patch. I can now set this original layer here to be a guide layer so that it won't show up in the main comp. Now we have a clean stop sign. The next step is pretty easy. I can just drag the school of motion logo right onto this comp and then scale it down and position it where I need it for this, because the shot is in perspective. It might actually be easiest to use the corner pin effect.
Mark Christiansen (08:38): Now the perspective looks right on it, but it's missing some of the texture that was showing through on the stop sign letters. In fact, if we turn these layers off and look at the stop sign letters, they're not truly white. So I'm also going to apply a fill effect, the school of motion logo, I'll color, pick the main white color of the stop sign. I'm going to try and find the brightest part, which is probably right about there. Then I also want to try to get some of that gritty stuff to show through. So here's what I'm gonna do. I'm gonna duplicate my patch layer and move it above the school of motion logo. Then I'm going to duplicate the logo and move it above and set my patch to use that as an alpha mat. Let me rename these. So it's clear what they are.
Mark Christiansen (09:18):Then I'm going to use the hue and saturation effect to remove all the color from this. Then a levels affects that I can get more contrast out of the image. Then I can set this to multiply mode so that it shows up over the logo. Next I can adjust the levels, even further play with the opacity until I'm happy with it. This logo is also very sharp compared to the rest of the image. If you look at the edge of the stop sign here, you can see that the edges are definitely not very sharp because this is a prosumer camera. So I need to mimic that the quickest ways just to add fast box blur to pixels seems to work pretty well. So now the logo is comped onto the sign. It's even got some of that grunge and dirt showing through and voila. We have successfully tracked in a pretty photo realistic way, the school of motion logo onto a stop sign.
Mark Christiansen (10:07): Now to really sell this composite, there was a little bit of extra work I had to do. I had to key frame a level's effect because the darkness of the stop sign changed a little bit as the camera pan toward it. I also had to adjust the saturation. So I used the tint effect to do that. Then I added noise to match the digital noise from the camera. These are all the things we talk about in visual effects for motion, and they're all very helpful in selling a composite. Pretty cool, huh. Now, you know, one of my favorite MOCA power moves this trick has saved me so much time. Make sure to hit subscribe. If you want more tips like this one and check the description so that you can download the project files from this video. If you want to really learn the ins and outs of positing tracking match, moving roto and more all with the help of experienced industry pros and fun real-world challenges, check out our class VFX for motion. Thanks for watching.
Dive into real-time 3D with our Unreal Engine beginner's course by Jonathan Winbush. Master importing assets, world-building, animation, and cinematic sequences to create stunning 3D renders in no time! Perfect for motion designers ready to level up.
Explore this Course ➔
Unlock the secrets of character design in this dynamic course! Explore shape language, anatomy rules, and motifs to craft animation-ready characters. Gain drawing tips, hacks, and Procreate mastery (or any drawing app). Ideal for artists seeking to elevate their craft.
Explore this Course ➔
Elevate your freelance motion design career with our guide to client success. Master a repeatable method for finding, contacting, and landing clients. Learn to identify prospects, nurture leads, and develop a thriving freelance philosophy amidst chaos.
Explore this Course ➔
Rev up your editing skills with After Effects! Learn to use it for everyday needs and craft dynamic templates (Mogrts) for smarter teamwork. You'll master creating animated graphics, removing unwanted elements, tracking graphics, and making customizable templates.
Explore this Course ➔
Stand out with Demo Reel Dash! Learn to spotlight your best work and market your unique brand of magic. By the end, you'll have a brand new demo reel and a custom campaign to showcase yourself to an audience aligned with your career goals.
Explore this Course ➔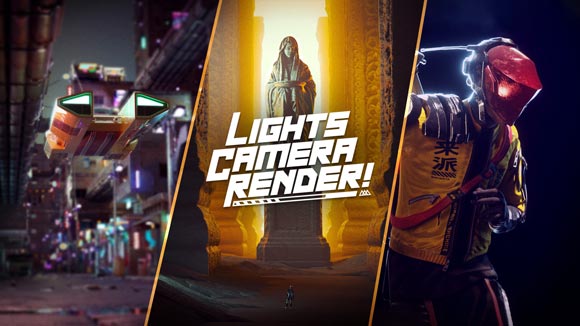
Illuminate your 3D skills with Lights, Camera, Render! Dive deep into advanced Cinema 4D techniques with David Ariew. Master core cinematography skills, gain valuable assets, and learn tools and best practices to create stunning work that wows clients.
Explore this Course ➔
Master After Effects at your own pace with Jake Bartlett's beginner course. Perfect for video editors, you'll learn to create stylish animated graphics, remove unwanted elements, and track graphics into shots. By the end, you'll be equipped for everyday AE needs and more.
Explore this Course ➔
Revolutionize your Premiere workflow with customizable AE templates! Master creating dynamic Motion Graphics Templates (Mogrts) in After Effects to speed up your team's work. By the end, you'll craft easily-customizable templates for seamless use in Premiere Pro.
Explore this Course ➔
Not sure where to start?
If you’re a beginner, here are some great courses to help you get started:
After Effects Kickstart
Dive into the fundamentals of motion design with our most popular (and recently updated) After Effects course.
Photoshop + Illustrator Unleashed
Master the basics of Photoshop and Illustrator and gain invaluable insights in this introductory level course.

Design Kickstart
An introduction to the design principles behind all great work.
More Advanced?
If you’re a more advanced student looking to up your game, here are some great options:
Animation Bootcamp
Learn the art and principles of creating beautiful movements in Adobe After Effects.

Design Bootcamp
Learn to design for motion in this intermediate-level, project-based course.
Cinema 4D Basecamp
Learn Cinema 4D from the ground up in this exciting introductory C4D course.
Now is the time to learn the skills you need to advance in your motion design career:


