


Trying to find your missing objects in Cinema 4D? Here's why certain objects might not be visible.
You might be chugging along in Cinema 4D when you come across something that isn’t quite right. For some reason or another, there’s been a change in the Matrix and now, you aren’t able to see your objects in Cinema 4D.
It can be a real chore trying to fault find why an object can’t be seen, either in the viewport or in a render. Hopefully this little troubleshooting checklist can bring some clarity.
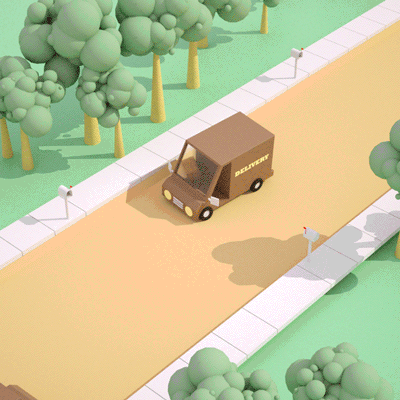
You can follow along with the rest of this article using a scene file that contains the models I used to create this fun little gif.
{{lead-magnet}}
1. VISIBLE IN EDITOR / VISIBLE IN RENDERER CONTROLS
An object’s “traffic lights” are the tool used to control its visibility in the viewport and in the render.
- The top light controls editor visibility
- The bottom controls an object’s visibility in the render
(red = off, green = on, grey = default or inherit behavior from its parent object).

If you can’t see your object in the viewport, first double check the object’s traffic lights. It could very well be visibly disabled in the editor, but not in the render or maybe both editor & renderer are off. Also, be sure to check the hierarchy that your object might be nested in and the visibility states of its parent(s). Is the parent visibly disabled in the editor?
Pop quiz: Different Traffic Light States
Of the objects you see here, which will you see in the viewport & the render? See the answers at the end of the article!


2. CHECK THE LAYER MANAGER
The layer manager is a great organizational tool for grouping sets of objects together. Don’t confuse these as 2d/3d layers or anything that deals with stacking or spatial information. Instead think of them like labels in Gmail: category labels that you can easily add to object and then filter and sort.
Assign all your lights to a layer and all your scenic objects on to another layer, for example. They’re like what the traffic lights do for individual objects, but on a global level.
And this is where you can shoot yourself in the foot. If you can’t see your object in Cinema 4D even though your traffic lights check out, you’ll want to see if that object is assigned to a layer & if so, if the layer’s visibility is disabled too.

3. VIEW CLIPPING
This one tends to catch people off guard who are working with extremely small or large scene scales. As a general rlue of thumb, it’s always a good idea to work in real world scale. But if you aren’t (or inherited a project that doesn’t) you’ll likely come across this issue in the viewport where as you move the camera, your object begins to partially or completely disappear.
This is a result of view clipping, where if an object falls outside of the near & far distance of the camera, the viewport will simply stop drawing it.
Under the project settings > view clipping you can change the setting according to the size of your scene with the dropdown presets or entering custom near/far distances.

4. REVERSED NORMALS & BACKFACE CULLING
Normals indicate the direction a polygon is facing. If you’re dealing with editable geometry, your polygons could have reversed normals (ie. polygons facing inward to the object rather than outward). Cinema 4D has a viewport feature called backface culling which tells the viewport to not draw any polygons that are facing away from the camera.
So, if your object has reversed normals and backface culling enabled, you might not see your complete object in the viewport. Simply ensure that all your object’s polygons are facing the right way and disable backface culling.

5. OUT OF FRAME
One reason you can’t see your object in Cinema 4D is it could simply be out of frame. Cinema 4D has a handy tool that lets you visualize where the off-screen object is in relation to your camera.
If your object is selected in the object manager and out of the current field of view, C4D draws a blue arrow on the edges of the frame to let you know where the object is. To move the viewport camera and frame up the object, make sure your object is still selected in the object manager and hit ‘H’ on the keyboard.

6. MATERIAL TRANSPARENCY
Another possibility in the fault-finding process is to check the object’s material transparency. An object with transparent material appears in the viewport with a ghosted, semi-transparency but when rendered, can disappear completely depending on the transparency settings.
7. DISPLAY TAG SET TO 0%
Check to see if your object has a display tag associated with it. If it does and the visibility on the display tag is set to 0%, you won’t see it drawn in the viewport or rendered.

8. PRIMITIVE/GENERATOR TURNED OFF
Are any of your parametric objects turned off? Any of the blue icon primitives or green icon generators will have a green check (enabled) or red X (disabled) next to these ‘live’ objects. Objects made editable won’t have these.
Pop Quiz Answers!
And now the moment you’ve all been waiting for… the pop quiz answers. Could you tell what’s visible just looking at the traffic lights in the object manager?


Workflow Tips in Cinema 4D
Often times if you can’t see your object in Cinema 4D, it’s inadvertently due to one of the factors listed above. Sometimes an object isn’t visible because you genuinely deleted it from the object manager (probably on accident right?). In cases like this, it is always a good idea to work with a safety net like turning on auto-save.
An even bigger tip is to work with files that are saved to cloud storage like Dropbox. Dropbox will auto-version your file periodically and you can restore any of the previous versions should your scene file go corrupt or something like that. Ok so now that you know the tricks, let’s go make some magic!

Dive into real-time 3D with our Unreal Engine beginner's course by Jonathan Winbush. Master importing assets, world-building, animation, and cinematic sequences to create stunning 3D renders in no time! Perfect for motion designers ready to level up.
Explore this Course ➔
Unlock the secrets of character design in this dynamic course! Explore shape language, anatomy rules, and motifs to craft animation-ready characters. Gain drawing tips, hacks, and Procreate mastery (or any drawing app). Ideal for artists seeking to elevate their craft.
Explore this Course ➔
Elevate your freelance motion design career with our guide to client success. Master a repeatable method for finding, contacting, and landing clients. Learn to identify prospects, nurture leads, and develop a thriving freelance philosophy amidst chaos.
Explore this Course ➔
Rev up your editing skills with After Effects! Learn to use it for everyday needs and craft dynamic templates (Mogrts) for smarter teamwork. You'll master creating animated graphics, removing unwanted elements, tracking graphics, and making customizable templates.
Explore this Course ➔
Stand out with Demo Reel Dash! Learn to spotlight your best work and market your unique brand of magic. By the end, you'll have a brand new demo reel and a custom campaign to showcase yourself to an audience aligned with your career goals.
Explore this Course ➔
Illuminate your 3D skills with Lights, Camera, Render! Dive deep into advanced Cinema 4D techniques with David Ariew. Master core cinematography skills, gain valuable assets, and learn tools and best practices to create stunning work that wows clients.
Explore this Course ➔
Master After Effects at your own pace with Jake Bartlett's beginner course. Perfect for video editors, you'll learn to create stylish animated graphics, remove unwanted elements, and track graphics into shots. By the end, you'll be equipped for everyday AE needs and more.
Explore this Course ➔Revolutionize your Premiere workflow with customizable AE templates! Master creating dynamic Motion Graphics Templates (Mogrts) in After Effects to speed up your team's work. By the end, you'll craft easily-customizable templates for seamless use in Premiere Pro.
Explore this Course ➔

Not sure where to start?
If you’re a beginner, here are some great courses to help you get started:

After Effects Kickstart
Dive into the fundamentals of motion design with our most popular (and recently updated) After Effects course.

Photoshop + Illustrator Unleashed
Master the basics of Photoshop and Illustrator and gain invaluable insights in this introductory level course.

Design Kickstart
An introduction to the design principles behind all great work.
More Advanced?
If you’re a more advanced student looking to up your game, here are some great options:

Animation Bootcamp
Learn the art and principles of creating beautiful movements in Adobe After Effects.

Design Bootcamp
Learn to design for motion in this intermediate-level, project-based course.
Cinema 4D Basecamp
Learn Cinema 4D from the ground up in this exciting introductory C4D course.
Now is the time to learn the skills you need to advance in your motion design career:


