Cinema4D is an essential tool for any Motion Designer, but how well do you really know it?
How often do you use the top menu tabs in Cinema4D? Chances are, you probably have a handful of tools you use, but what about those random features you haven’t tried yet? We're taking a look at the hidden gems in the top menus, and we're just getting started.

In this tutorial, we’ll be doing a deep dive on the Volume tab. Volumes are one of the newest features to come to Cinema 4D. They allow for the creation of clouds, smoke, and abstract geometry. They also offer a great way to model objects for those of us who don't want to deal with the technicalities of traditional modeling. Let’s get started.
Crank up the volume
Here are the 3 main things you should use in the Cinema 4D Volume menu:
- Volume Builder
- Volume Mesher
- Volume Loader
How to use the Volume Builder in Cinema 4D
This tool works by converting polygon objects into volumes.

However, the true power of this tool is its ability to perform Boolean operations. That is to either merge or subtract objects from one another. This is especially useful for creating sci fi objects.
x
Add some filters to manipulate the look of the volume. This can be as simple as rounding the edges and blending multiple objects a little more realistically, or as complex as introducing noise patterns to create organic shapes.
x
Lower the size of the voxels to increase the resolution of the volume. Just be careful not to lower it too much, or your machine may get stuck processing the volume.

How to use the Volume Mesher in Cinema 4D
The Volume Builder and Mesher work hand in hand. One produces the look and feel of the volumes, while the Mesher produces the polygons. Simply add a material and you are ready to start rendering.

The settings on this tool are relatively sparse. You have 2 sliders: Voxel Range Threshold and Adaptive.
VRT controls the threshold of the volume. Think of it as selecting the thickness of the volume.

Adaptive is to control the amount of polygons through the adaptive slider. The mesher produces a ton of polygons. Using this slider will lower the polygons on the flat areas while keeping the polygons on rounded areas to maintain the curvature.
x
You can also use the mesher with a Volume Loader, so you can create a mesh for volumes created in 3rd party software such as Houdini. So, if you have an explosion VDB, you can bring it in and create a cool mesh from the shape of the explosion. You can even have it be animated!
x
Don't know what the Volume Loader is? Well...
How to use the Volume Loader in Cinema 4D
Let’s say you downloaded a VDB pack from one of the many websites selling CG assets, and you want to bring it into your scene. Simple enough. Open it with the Volume Loader tool and you’ll have access to the usual attributes such as Density, Temperature, Fuel, Heat, and more.

Unfortunately, there is no way to render VDBs as smoke or fire in Standard Render. You will need a 3rd party render engine.
x
However, that doesn't mean that the volume loader is useless. Far from it! The loader works natively with the Volume Builder and Mesher. You can easily convert any loaded VDB into polygons, and with the builder, you can combine multiple volumes together.

Taking it a step further, you can also combine polygonal objects with VDBs to create really abstract effects.
x
Look at you!
As you can see, Volumes are great for creating abstract effects and also makes modeling a bit easier! The possibilities with Volumes are endless, the only limitation is your own imagination. So don't hold back and explore your creativity!
Cinema 4D Basecamp
If you're looking to get the most out of Cinema 4D, maybe it's time to take a more proactive step in your professional development. That's why we put together Cinema 4D Basecamp, a course designed to get you from zero to hero in 12 weeks.
And if you think you're ready for the next level in 3D development, check out our all new course, Cinema 4D Ascent!
Dive into real-time 3D with our Unreal Engine beginner's course by Jonathan Winbush. Master importing assets, world-building, animation, and cinematic sequences to create stunning 3D renders in no time! Perfect for motion designers ready to level up.
Explore this Course ➔
Unlock the secrets of character design in this dynamic course! Explore shape language, anatomy rules, and motifs to craft animation-ready characters. Gain drawing tips, hacks, and Procreate mastery (or any drawing app). Ideal for artists seeking to elevate their craft.
Explore this Course ➔
Elevate your freelance motion design career with our guide to client success. Master a repeatable method for finding, contacting, and landing clients. Learn to identify prospects, nurture leads, and develop a thriving freelance philosophy amidst chaos.
Explore this Course ➔
Rev up your editing skills with After Effects! Learn to use it for everyday needs and craft dynamic templates (Mogrts) for smarter teamwork. You'll master creating animated graphics, removing unwanted elements, tracking graphics, and making customizable templates.
Explore this Course ➔
Stand out with Demo Reel Dash! Learn to spotlight your best work and market your unique brand of magic. By the end, you'll have a brand new demo reel and a custom campaign to showcase yourself to an audience aligned with your career goals.
Explore this Course ➔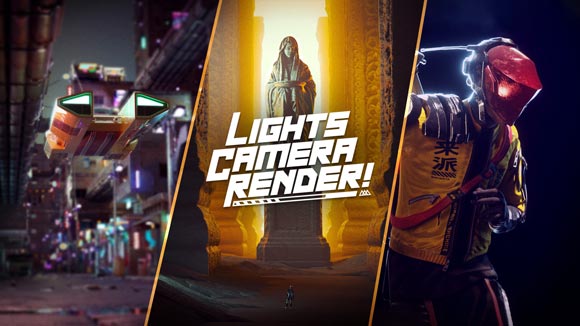
Illuminate your 3D skills with Lights, Camera, Render! Dive deep into advanced Cinema 4D techniques with David Ariew. Master core cinematography skills, gain valuable assets, and learn tools and best practices to create stunning work that wows clients.
Explore this Course ➔
Master After Effects at your own pace with Jake Bartlett's beginner course. Perfect for video editors, you'll learn to create stylish animated graphics, remove unwanted elements, and track graphics into shots. By the end, you'll be equipped for everyday AE needs and more.
Explore this Course ➔
Revolutionize your Premiere workflow with customizable AE templates! Master creating dynamic Motion Graphics Templates (Mogrts) in After Effects to speed up your team's work. By the end, you'll craft easily-customizable templates for seamless use in Premiere Pro.
Explore this Course ➔
Not sure where to start?
If you’re a beginner, here are some great courses to help you get started:
After Effects Kickstart
Dive into the fundamentals of motion design with our most popular (and recently updated) After Effects course.
Photoshop + Illustrator Unleashed
Master the basics of Photoshop and Illustrator and gain invaluable insights in this introductory level course.
Design Kickstart
An introduction to the design principles behind all great work.
More Advanced?
If you’re a more advanced student looking to up your game, here are some great options:

Animation Bootcamp
Learn the art and principles of creating beautiful movements in Adobe After Effects.
Design Bootcamp
Learn to design for motion in this intermediate-level, project-based course.
Cinema 4D Basecamp
Learn Cinema 4D from the ground up in this exciting introductory C4D course.
Now is the time to learn the skills you need to advance in your motion design career:


