
Cinema 4D is an essential tool for any Motion Designer, but how well do you really know it?
How often do you use the top menu tabs in Cinema 4D? Chances are, you probably have a handful of tools you use, but what about those random features you haven’t tried yet? We're taking a look at the hidden gems in the top menus, and we're just getting started.
In this tutorial, we’ll be doing a deep dive on the Tracker tab. This is all things motion tracking inside of Cinema 4D. These work best inside of the “Motion Tracker” layout.
DON'T LOSE TRACK OF THESE TIPS!
Here are the 3 main things you should use in the Cinema 4D Tracker menu:
- Motion Tracker
- Object Tracker
- Constraints
Motion Tracker in the Cinema 4D Tracker Menu
This is your main tool for any motion tracking. Once you have created the Motion Tracking Object, you just need to load in your footage. Make sure it is an image sequence.
Once loaded, the footage will appear in the viewport. Roll the playhead back and forth to see it animate.
x
By default, your footage will look a little blurry. This is because the tracker will display your footage at a resample rate of 33%. This is to help with playback.
Increase it if you want more clarity in the image. It also helps your track be more accurate at the expense of speed.
The space to the right of the Footage tab is 2D Tracking. This is where you begin the tracking process. Cinema 4D has a pretty good Auto Track feature. In some cases, this works just fine.
But in most cases, you will need to adjust your tracks manually. You can do this by using the Manual Tracking tab.
Once in the Manual Tracking tab, create a new manual tracker by simply Ctrl+clicking in the viewport.
x
Move it to a good position on the footage. A Tracker View will appear on the right.
Create as many points as you need. Use the Arrow buttons to move forward or backward in the timeline. Or hit the <Manual Track> button to have the tracker run through the entire clip.
Finally, once you have a nice 2D track, go on over to 3D Solve to create your motion tracked camera.
The more information you have about the camera, the more accurate your Solve will be. Cinema 4D will do its best to figure out the correct Focal Length and Sensor Size.
That’s how you track footage, but what if you want to track an Object in a scene?
Object Tracker in the Cinema 4D Tracker Menu
The Object Tracker works similarly to the Motion Tracker. However, its purpose is to track an object within your footage.
x
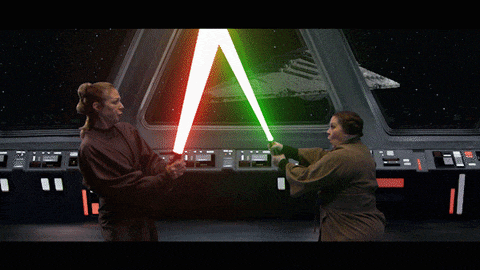
Say you have a broom stick in your footage and you want to replace it with the cool 3D model of a Lightsaber you got from Video Copilot. With this tool, you can!
Now, it’s important to remember that the Object Tracker doesn't work unless you have a Motion Tracker first. You will need to track the footage before tracking the object in the scene.
Now that you have your scene tracked, it’s time to track the object.
While in the Motion Tracker, it’s important to create some tracks for your object. We will need these for the next step. Create as many as you can for the best possible tracking.
Now, let’s create an Object Tracker.
Once you create the Object Tracker, it will automatically select your Motion Tracker object as the main motion tracker source. You just need to assign the Geometry Object, in this case, the big SciFi gun.
We will need to access those points you tracked for the Object. Go back to the Motion Tracker and select all of those tracks. Right click and go down to where it says “Assign to Object,” then select “Object Tracker”.
Those tracks will now be used by the Object Tracker to control the position of the SciFi gun.
Constraints in the Cinema 4D Tracker Menu
After you have tracked your footage, you may be noticing that the track looks a little off. Maybe the rotation is canted or the scale is really small. This is where Constraints come in.
These only work if you already ran the 3D solver and have a Solved Camera in the scene.
The Position Constraint acts as the World Origin point of the solve. Think of it as the center of the scene. Select a point that you would like to serve as the center object and create a Position Constraint.
The Vector Constraint works by defining the XYZ space of the footage. Select two points horizontal to each other and set it as X.
Select two points on a vertical surface and define it as Y.
Select two points along the depth of the scene and set it to Z.
These will help the tracker orient the camera correctly with the footage.
Finally, we have the Planar Constraint. This works similar to the Vector Constraint, with the exception that it uses a Plane. Great way to identify floors and walls.
With all of these working together, you should be on your way to achieving really clean Motion Tracking directly inside of Cinema 4D!
x
Look at you!
There was a time when tracking of this quality would cost $10,000 with a program called Boujou. Now, camera tracking is a built-in feature of Cinema 4D and After Effects. It is the key ingredient for adding VFX to your footage. Do us Mograph old timers proud and make that movie magic.

Cinema 4D Basecamp
If you're looking to get the most out of Cinema 4D, maybe it's time to take a more proactive step in your professional development. That's why we put together Cinema 4D Basecamp, a course designed to get you from zero to hero in 12 weeks.
And if you think you're ready for the next level in 3D development, check out our all new course, Cinema 4D Ascent!