


Whether you're wondering where to start, stuck in pre-production, or uncertain when a motion design is ready to share, this handy guide will help you turn your passion into a finished project.
You've been scrolling through Instagram, stopping to awe at those crafty DeeKay animations and drooling over Beeple's everyday projects — and feeling inspired. In other words, you're eager to start your own motion design project... But, motivation can only take you so far.
If you're struggling to convert your motion design ideas into MoGraph action, or even to ideate your own concepts, we have the solution.
In this guide, we'll shepherd you through the eight essential steps of motion design pre-production, followed by the five fundamental phases of creating and completing a motion design project.

Pre-Production for Motion Design
Have you ever driven by a construction project in your neighborhood? The carpenters, electricians and plumbers are following a blueprint — and that blueprint was drafted, presented to the client, revised, approved and then finalized all before hammer struck nail.
The construction of a motion design project is no different, and the blueprint for your MoGraph is designed in the pre-production stage. If done correctly, following all the necessary steps, your blueprint will guide you through the entire process, increasing your efficiency and chances of success from project start to finish.
If, as you begin your project, you feel the need to skip a step or work backward, don't worry — the steps are somewhat interchangeable, and you may even jump back and forth among the steps as you fine tune your design.

1. GENERATE YOUR IDEA
An idea can seem to erupt out of nowhere, or require significant effort; as a result, the formulation of a project idea can thrill or haunt the novice or experienced motion designer. No matter what, though, the key to conjuring the next great concept is inspiration.
But, I never have ideas...
Don't worry: at one time or another nearly everyone feels this way — and, most likely, you're overthinking it.
Incredible projects like those created by Ash Thorp and other industry giants set such a high standard that you're probably overlooking the simplest trick for getting started: Just do something — it doesn't have to be perfect.

Set yourself down at your workstation, and make something jump. Make something jump, and then twirl. Pick a band, and animate their logo. Download any logo you find online, animate it, post your #fanart MoGraph on social media, and tag your post with the account name of the band, brand or business. Then, move on to another logo.
Sometimes, all we need is a shift in perspective. Allow this process to persuade you that you "just need to animate something."
Look around you — what can you manipulate?
2. DEVELOP AND OUTLINE YOUR IDEA
Once you have your idea, lay down the foundation before worrying yourself with the more intricate details. You don't shop for wallpaper before you build the wall.
Start by writing down the basics; for example:
"A cube that jumps off the top of a building and hits the ground really hard."
Now you have a concept, and points of action from which to work.

Next, add detail.
What are some attributes you can assign to the main subject? What feelings do you want your animation to evoke? Is it a comedy or tragedy?
Is something blocking your square from jumping? Is the square heavy and having difficulty making it over the ledge?
With each new detail, you gain something new to animate.
By the end of your brainstorm, your MoGraph concept might look something like this:
"Evil spheres are attempting to stop one brave cube from escaping. The cube overpowers the puny spheres with its shear weight, jumps off the edge of the building and lands with a hard thud on the sidewalk."
Now we're on to something...
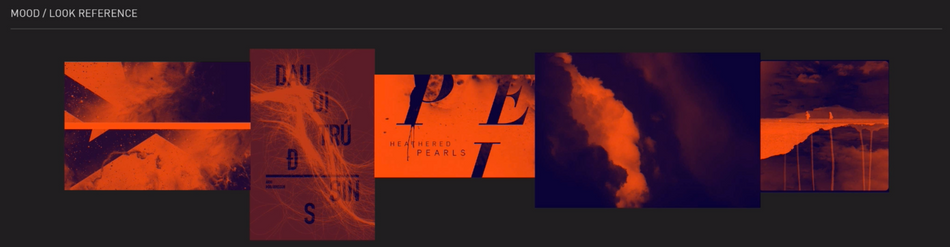
3. COMPILE A MOODBOARD
With your idea in motion, your next step is to determine how you want your design to look and feel. To organize your thoughts, create a moodboard, adding 'clippings' from anything and everything that fits your vision.
Not yet sure of your vision? No problem. It will likely appear before your eyes, on the very moodboard you're tacking together.
Don't know where to look? That's okay, too.
- Now is a great time to experiment with new styles by reverse-engineering someone else's work.
- You can also scroll through Pinterest and collect your favorite graphics.
- Or, feel free to leverage one of the many motion graphics moodboard tools our very own Zak Tietjen has compiled.
Whichever route(s) you take, be sure to carefully file and organize your assets. This could be the difference between forward momentum and stalling out.
4. SKETCH AND STORYBOARD
Next, roughly sketch and storyboard your MoGraph, shaping your story thumbnail by thumbnail.

Pro Tip: Start with your first scene, fast forward to your final, and then fill in all the transitions. This will ease the process.
5. DESIGN STYLEFRAMES
Now, it's time to synthesize style and substance.
How do you want your characters, shapes, objects, scenery and other details to look? Use your moodboard as your visual guide, and transform the rough thumbnails of your storyboard into styleframes.
Pick a few frames to start, and consider creating two or three variations.
Perhaps you want to change your cubes into pyramids, as in the example below from School of Motion Design Bootcamp project "Expedition 100" by Michael Muller.

Pro Tip: Strive to design beyond your perceived limitations, as this will influence you to be more inventive throughout the remainder of the process.
If you're not comfortable with design, consider this step an opportunity to collaborate with other artists. Find someone in your professional network, online animation groups, or fellow alumni from courses you've completed. They may be able to apply a facelift to your design, while leaving the motion graphic elements to you.
6. DEVELOP AN ANIMATIC
With your 2D story designed, you may feel inclined to transition to production boards and your final animation; however, much can be gleaned from the intermediary step of developing an animatic. Chances are, creating your animatic will help you discover what will work and what won't, where you can speed up, and where you should slow down — before you're too far along in the production process.
The following is an animatic created by Deanna Reilly for the School of Motion Explainer Camp course.
Now, watch her final animation, and take note of how little the story, timing and pacing differ from the original animatic.
When creating your animatic:
- Lay out all your art boards in your timeline.
- Sync the art boards with your music or voiceover.
- Create a simple animation for your main subject or key elements.
As seen in the transition between the two videos above, your animatic should serve as your guide during production, communicating — with minimal viable effort — the timing of the piece, as well as what will happen, where and when.
7. CREATE YOUR PRODUCTION BOARDS

A smartly built Illustrator document — like the one above from a Design Bootcamp project by Bruna Cremm — can make the animation process a breeze.
With that in mind, and your animatic as your guide, build out your story's production board, camera change by camera change and scene by scene. Since you'll be animating this artwork later, create each layer at near-final quality.
8. SOLICIT PRE-PRODUCTION FEEDBACK
Before transitioning into production, solicit as much feedback as possible on your work thus far. Let each reviewer assess your story, animatic, designs and production boards.
Ask people you trust, such as past instructors and teacher's assistants; fellow students from courses you've completed; industry peers; members of design groups to which you belong; and even friends and family — and be prepared for criticism. In fact, ask them to 'tear it apart.'

Even if they don't offer advice on how to fix an identified problem, the stronger their critique the more you'll learn.
And, of course, if it's your personal passion project, you don't have to change anything.
Pro Tip: If you're following this guide for a client project, be sure to request feedback at every step of the process. Otherwise, you may deliver a production board and discover your original concept was off the mark, sending you back to step one.
Finishing Your Motion Design Project
If you're like most of us, you probably tinkered with your pre-production work — at least a little — as a result of the pre-production feedback. Chances are, that was the right choice; hopefully, you received more feedback on your updated version, and now you're confident you're ready to begin production.
Congratulations! Here's where the work really starts.

It's time to break apart the production process, and piece together your new work of art.
1. GATHER AND ORGANIZE YOUR ASSETS
Like a carpenter with their tools, you'll want to ensure you've collected and carefully structured all your assets before beginning your build.
While you should have already begun filing assets back in step three of the pre-production process, now's your last chance to get organized before setting yourself up for a potentially serious setback.
Searching for assets after this step can severely derail your momentum, especially if you're animating on behalf of a client. (In other words, you don't want to have to ask your client for a file you should already have.)
Your folder system should look something like this:

So, create your folders, using the above as a guide, and then gather and correctly file the following (as applicable):
- Music
- Voiceover or Scratch Vocal
- Fonts
- Textures
- Images
- Video Footage
- Scripts
- Reference Photos
- VFX
For more tips on organizing your motion design projects, click this — Post Haste.

2. DESIGN YOUR ROUGH ANIMATION
In the pre-production process you created an animatic, establishing your animation's key points and general timing. Now, use your animatic as a guide for your rough animation.
Start by animating the key elements in your scene, without finessing the movements (unless necessary), so you can first determine how the scenes and key elements will interact with each other before locking in any move. Then, add in the secondary, supportive elements.
Once you've started animating your scenes, you may discover, for example, that a certain spot is too long or a certain movement is too fast. It's okay to push or pull the timing of an individual scene, if a better flow or story begins to emerge; however, be sure to track the time you're borrowing so can adjust the play time initially planned.
Before moving on to final animation, you should most likely seek out some pre-final feedback.
3. FINALIZE YOUR ANIMATION
Now that you're in the final animation phase, your timing should be at least close to completely locked in. This is your chance to finesse, so finesse everything!
Ensure all your movements are clean and all your animated scene transitions are seamless — and, if they're not, don't be afraid to start over with a new rough animation.
Pro Tip: Be patient with yourself. It takes trial and error, and we've all had to begin again at least once before.
Once you're satisfied, you may want to export and deliver. But don't.
Push your animation to the next level by incorporating compositing, color correction and sound design. This is how the MoGraph pros create animations with that real-world look and feel.

4. SOLICIT FINAL FEEDBACK
As in the pre-production process, your last step (before delivery) in production is to request feedback. Again, seek reviews from people you trust, and ask them for their honesty, no matter how brutal.

This will improve your animations, your networking relationships, and your ability to adjust and adapt. Not to mention, if you're working on a project for a client, you can't be too careful.
Once you've received and processed your critique, make any necessary revisions before exporting and delivering your final animation.
5. DELIVER YOUR FINAL ANIMATION
Once you've completed your animation and exported it, it's time to deliver. In other words, the home's been built — from blueprint to foundation to final flourishes — and now it's time to move in.
If you've been working on a client project, your final step is simple: send it off. If, however, you've completed a personal passion project, the next step(s) is/are up to you.

You could file it away on your computer, behind lock and key, but this is not recommended. Why not use your latest and greatest work to attract new clients?
To do so, add your project to your online portfolio or professional website. Then, promote it via email and social media, linking back to the project. Be sure your email newsletter and portfolio/website have information on how to contact or hire you, so readers and viewers can take action.
If you've taken photos, screenshots or screen recordings of your process, use these on social media first to tease the project's release. Then, follow up with the actual project link.
Of course, there are best practices for securing the most views, clicks and engagement on your emails and posts. So, be sure to research blogs run by Hubspot, CoSchedule, Social Media Examiner, etc., for insights.
If you've uploaded your animation to Vimeo and are looking to attract the attention of Vimeo staff, we can help with that.
Want to Master the Animation Process?
No problem. We offer two options:
- Explainer Camp. In this project-based course, you’ll take a client project all the way from the initial phone call to the final delivery, practicing storytelling, storyboarding, design, animation, editing, and every other facet of the real production process.
- The Path to MoGraph. In this free introduction to the world of motion design, you'll get an in-depth look at what it's like being a motion designer, exploring the process of creating a real-world project and the software, tools and techniques you'll need to break into this growing industry.

Dive into real-time 3D with our Unreal Engine beginner's course by Jonathan Winbush. Master importing assets, world-building, animation, and cinematic sequences to create stunning 3D renders in no time! Perfect for motion designers ready to level up.
Explore this Course ➔
Unlock the secrets of character design in this dynamic course! Explore shape language, anatomy rules, and motifs to craft animation-ready characters. Gain drawing tips, hacks, and Procreate mastery (or any drawing app). Ideal for artists seeking to elevate their craft.
Explore this Course ➔
Elevate your freelance motion design career with our guide to client success. Master a repeatable method for finding, contacting, and landing clients. Learn to identify prospects, nurture leads, and develop a thriving freelance philosophy amidst chaos.
Explore this Course ➔
Rev up your editing skills with After Effects! Learn to use it for everyday needs and craft dynamic templates (Mogrts) for smarter teamwork. You'll master creating animated graphics, removing unwanted elements, tracking graphics, and making customizable templates.
Explore this Course ➔
Stand out with Demo Reel Dash! Learn to spotlight your best work and market your unique brand of magic. By the end, you'll have a brand new demo reel and a custom campaign to showcase yourself to an audience aligned with your career goals.
Explore this Course ➔
Illuminate your 3D skills with Lights, Camera, Render! Dive deep into advanced Cinema 4D techniques with David Ariew. Master core cinematography skills, gain valuable assets, and learn tools and best practices to create stunning work that wows clients.
Explore this Course ➔
Master After Effects at your own pace with Jake Bartlett's beginner course. Perfect for video editors, you'll learn to create stylish animated graphics, remove unwanted elements, and track graphics into shots. By the end, you'll be equipped for everyday AE needs and more.
Explore this Course ➔Revolutionize your Premiere workflow with customizable AE templates! Master creating dynamic Motion Graphics Templates (Mogrts) in After Effects to speed up your team's work. By the end, you'll craft easily-customizable templates for seamless use in Premiere Pro.
Explore this Course ➔

Not sure where to start?
If you’re a beginner, here are some great courses to help you get started:

After Effects Kickstart
Dive into the fundamentals of motion design with our most popular (and recently updated) After Effects course.

Photoshop + Illustrator Unleashed
Master the basics of Photoshop and Illustrator and gain invaluable insights in this introductory level course.

Design Kickstart
An introduction to the design principles behind all great work.
More Advanced?
If you’re a more advanced student looking to up your game, here are some great options:

Animation Bootcamp
Learn the art and principles of creating beautiful movements in Adobe After Effects.

Design Bootcamp
Learn to design for motion in this intermediate-level, project-based course.
Cinema 4D Basecamp
Learn Cinema 4D from the ground up in this exciting introductory C4D course.
Now is the time to learn the skills you need to advance in your motion design career:


