
To become a more marketable editor, it helps to have a little motion in your tool belt. Here are 10 tools every video editor should know.
These days, it’s tough to be a PURE editor. Having even basic motion design and compositing skills can make you quite a bit more marketable. It’s possible you’ve already been doing some of these tasks (the hard way), and maybe this article can change that. There are a ton of tools in After Effects that can make your life easier.
While it’s a different program and does have a learning curve, AE is the place to go when you want to take your work to the next level. It’s the superior choice for:
- More advanced compositing, cleanup, and vfx
- Better titles, lower thirds, etc.
- Creating new elements from scratch: Intros, backgrounds, supporting graphics, etc.
If you're looking for a deep well to dive into, this series from Adobe (which has a few familiar faces from School of Motion) is a great place to start...though perhaps a bit long for newbies. If you're just getting started, read the rest of the article first.
Compositing in After Effects and Premiere
Compositing: The process of combining digital elements together to create visual unity
- Also includes lots of cleanup tasks like removing or de-emphasizing elements
- Putting your characters in new places, adding new elements (vfx), etc.
During post-production, you might notice that a car appears in a shot and needs to be removed. Adobe Premiere has some decent tools to affect this change...but you'll be fighting the system to keep things looking right. Once you get past basic compositing, it’s usually easier and more efficient in After Efficient.
That's not to say you always have to do your work in two programs. Sometimes staying in one app is its own form of efficiency. Premiere is great for keying and layering elements, and recent updates have made the process even smoother.
For ease, let’s include some basic shot-fixing tasks under this heading.
One of the most common fixes editors tackle is an unstable shot, and Premiere CAN be pretty capable. The Warp Stabilizer effect is the same under the hood in both programs—though AE gives you more options to DO STUFF after the fact. But if you’re just looking to remove some of the handheld bumps, give the Pr version a shot first!
Keying in After Effects and Premiere
Chroma keying is the basis of a LOT of compositing work. It’s one of the easiest ways to quickly remove the background from a person or other video element, allowing you to composite it into a new environment.
.gif)
All keyers have the same basic steps: sample a color to remove it, then refine the details.
Premiere is very capable at keying! Ultra Key is your best bet for pro results. If you just have basic keying needs, such as a locked-off shot of a person that needs a background replaced, you have all the tools you need right in the app.
To learn more about using Ultra Key in Premiere, check out this helpful video from our friend Premiere Gal.
If this is a more complex compositing job—say the camera is moving, or you need to start connecting other elements so they can move along with your subject—it’s time to take this project over to AE. After Effects has multiple keying solutions, but Keylight is your best bet for a full-featured, powerful keyer. The basics are the same: sample the color, dial in the details.
Now you’re ready to add in other compositing and animation techniques (many of which are outlined below) to complete your shot.
Blending Modes in After Effects and Premiere
The idea behind Blending Modes is the same across all the Adobe apps. These can be an easy way to work with alpha (transparency), luminance (brightness) or color information to layer elements onto others in interesting ways. If you’ve ever used Multiply or Add in Photoshop, you’re already on your way!
Blending modes are useful for both utility and creative purposes. They can be a quick way to add in graphics that don’t already have existing transparency, to add subtle coloring into part of your final look, or even create psychedelic color combinations.
In Premiere, you can access blending modes for any clip under Effect Controls > Opacity > Blend Modes. Again, if your needs are relatively simple, you can probably handle it here in the app!
After Effects has a few extra blending modes, and makes them much more accessible. If you find yourself scrolling through that Effect Controls menu more than a couple of times to make adjustments, it might be time to move over to AE.
Masks/Masking in After Effects and Premiere
Masking is a way to isolate elements so you can do compositing work.
- Cut away parts of a clip
- Color-correct specific elements
- Apply effects (like blur or mosaic) to specific parts of the frame
Cutting out elements in Premiere is fairly simple. Use masking tools under Effect Controls > Opacity (per clip) to create elliptical, rectangular or custom masks. You can animate these frame-by-frame (yiiiikes) or use the Mask Tracker. (More on tracking in a minute)
To mask an effect, first apply the effect (such as Mosaic), then use the masking controls within that effect’s settings.
Animating a mask frame-by-frame is possible in Pr, but that's very tedious. Premiere does have a rigid mask tracker, which is good for following a relatively-constant shape within a shot, even if it’s moving around within the shot. This is useful for blurring faces or license plates, or isolating an element for color correction.If you want to do more than the basics with your masks, or start attaching them to other things (or other things to them), it is significantly easier and more efficient to take this task to After Effects. I can go on for pages about how to properly use masks in AE, but it's easier just to show you.
Roto Brush 2 in After Effects
After Effects has more advanced tools for isolating elements, such as Roto Brush. If the element you want to isolate changes (isn’t a constant shape throughout the shot) this is your solution.
With Rotobrush 2, you can seamlessly cut out people or other elements, replace the background, color-correct, or do … pretty much anything you can imagine.
Tracking in After Effects and Premiere
As mentioned, Premiere does have a rigid mask tracker, which is good for following a relatively-constant element in a shot, even if it’s moving around within the shot. This is useful for blurring objects, or isolating an element for color correction.
x
If you need to get more advanced, it’s AE time. You’ve got the same mask-tracking capabilities, plus single-or-multiple point tracking, planar tracking with Mocha, and 3D camera tracking. This will be your solution for adding text or other elements into a moving shot, replacing device screens, or … adding pretty much anything else you can imagine.
Again, After Effects gives you more options for layering, connecting things together, and is just built for this stuff.
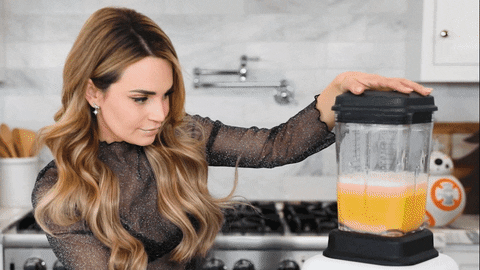
Content Aware Fill in After Effects and Premiere
When there’s an element in your shot that needs to disappear, Content Aware Fill is your solution. CAF is a more advanced compositing task, but in this case more advanced doesn’t necessarily mean harder! It’s a great example of something you can’t do in Premiere.
The first step is isolating your element(s), so see Masking above. You could actually start part of the process in Pr (mask tracking), but CAF only exists in AE. It can work magic in the right context, though! We covered this an a lot more when reviewing the updates to After Effects.
If you’ve already got some AE experience and want to learn more about compositing, we actually built an entire course around the visual effects power of Adobe's program: VFX for Motion!
VFX for Motion will teach you the art and science of compositing as it applies to Motion Design. Prepare to add keying, roto, tracking, matchmoving and more to your creative toolkit.
Animating in Premiere VS After Effects
Let’s get this out of the way first: Premiere isn’t built to be an animation program, just like After Effects isn’t built for video editing. That said, Premiere can easily import existing still graphics—including layered Photoshop documents or vector art—as well as create text and shape elements. As long as you have proper expectations, it can be a convenient place to handle simple graphics, or to rough-animate elements that you can later finesse in AE.
Every visual element on a Premiere timeline (this includes video clips, still images, imported graphics, nested sequences, and graphics created with the Essential Graphics Panel) has the ability to be adjusted—or animated—under Effect Controls > Motion.
Keyframes indicate a property’s specific value at a specific time. If you set a clip’s Scale to 50% at frame 0, create a keyframe, and then set Scale to 100% a few seconds late …you’ve just created an animation!
To learn the basics of keyframing properties in Premiere, check out this video from Justin Odisho:
Premiere gives you the ability to adjust the spatial or temporal interpolation (more commonly known as easing) to your keyframes—making ‘em smooth, to put it plainly—and even has a pretty nice graph editor! Once you’re trying to animate multiple properties or multiple layers together, you’ll quickly start feeling the limits of Premiere’s graphics workflow. Then it’s time to move over to After Effects. Fortunately, it’s easy to send all your work over to AE, including any keyframes you’ve already created.
Layout in After Effects and Premiere
As with keyframing, once you’re trying to artfully arrange more than a couple elements in Premiere, you’ll start feeling those workflow woes—it’s just not something the app is built for. All the tools are here, you’ll just be putting a LOT of mileage on your mouse, and spending a lot more time than if you work in another app that’s more design-friendly.
Design Basics for Editors
If you’re primarily an editor, you may have never had much actual design training. Well, I’m here to tell you that design concepts are just as important for lower third and simple title graphics, and knowing even a little bit can help elevate your work bigtime.
You or your cinematographer spent time and energy making your footage look beautiful, right? If you don’t give the same care and attention to the graphics you’re including, they’ll stick out like a sore thumb.
Here are some basic design concepts you need to know:
CONTRAST:
Contrast draws the eye and makes the important parts of your composition stand out for the viewer. Use it wisely. Remember that a small name graphic in the corner should be playing a supporting role, not pulling all the attention away from the person talking onscreen.
Contrast neatly ties into our next topic: Value.
VALUE
Strive for a good value range so your image isn’t all dark or all light. Again, if you’re adding graphics over existing footage, everything needs to fit together in a harmonious way, and share attention appropriately.
It's also important to build value in a strategic way, as explained in this nifty video.
HIERARCHY
If everything is given equal importance, then nothing feels important. Make sure every shot has a “star” and “supporting actors” within the graphic elements you create.
.gif)
Use sizing, positioning, and contrast to help your viewers immediately understand the important of each element.
COMPOSITION
Just as in shot composition, there are some rules that just make things … look better. The Rule of Thirds is one of the easiest: draw imaginary lines (or use guides and make them real!) dividing the screen into 3 equal pieces, both vertically and horizontally. You generally want titles or graphics elements to fall roughly on these lines, or at the intersections.
.gif)
TYPEFACE CHOICES
A typeface adds meaning to whatever it’s used on. Readability should be your first concern—especially in video—so keep it simple.
Use fewer fonts for bigger impact. Choose one or two complementary fonts for star and supporting text. It's also important to understand kerning, leading, and how font choice can impact tone...which is why we've gone into far more detail on this subject before.
Design is critical for every visual medium, and we are constantly learning new ways to tell bold, interesting stories through motion. That's why we developed Design Kickstart!
In Design Kickstart, you’ll take on industry-inspired projects while learning key design concepts that will elevate your design work right away. By the end of this course, you’ll have all of the foundational design knowledge necessary to start crafting storyboards that are motion ready.
Adding Graphics to Premiere
Want to stay in Premiere, but still use high-quality motion graphics? Mogrts (Motion Graphics templates) make motion design flexible and accessible to users of all skill levels.

Over the past couple years, Adobe has created a great new way to work with graphics in Premiere Pro (or Premiere Rush): Motion Graphics templates. These can be built in either Premiere Pro or After Effects, then saved as a special template file that later lets an editor (or you) quickly and easily change specific elements.
For example, imagine of using a fully-animated title graphic built by an expert motion designer...but all you have to update is the text, and you don’t even need After Effects installed on your system. Recently, Adobe added Media Replacement into the mix, meaning images or videos can also become customizable elements. The possibilities are nearly limitless.
To learn more about Mogrts and what you can do with them, check out our recent Mogrt Madness campaign.
Premiere to After Effects Workflow
Adobe has done some really nice work creating a smooth workflow between Premiere and After Effects. You can send single clips or entire editable sequences seamlessly from Pr to AE, and drop unrendered AE compositions right back onto your Premiere timeline!
To learn more about this workflow, we've created a number of detailed articles:
- Copy from Premiere to After Effects
- The After Effects to Premiere Workflow
- Creating a Dynamic Link between Premiere and After Effects
Even if you’re an After Effects wiz, Premiere absolutely has a place in your motion design arsenal. Knowing when to choose the right tool for the right job is the most important part of professional design. No matter where you are in your career, it's never a bad idea to experiment with new applications and shake up your workflow. And if you have any questions along the way, we're here to help.
Time to add motion to your tool kit!
If this article did the trick, you've probably got a new itch to scratch with motion design. Fortunately, we have an easy topical remedy. Learn the basics of the world's most popular motion design software in our intro course taught by Nol Honig: After Effects Kickstart!
After Effects Kickstart is the ultimate After Effects intro course for motion designers. In this course, you'll learn the most commonly used tools and best practices for using them while mastering the After Effects interface.